http://evolve.elsevier.com/McCuistion/pharmacology
Administration of medications is a complex but routine nursing activity, and nurses play a significant role in preparing, administering, teaching, and evaluating their patients’ responses to the drugs they administer. Whether in an acute care, clinic, restorative, or home setting, nurses work closely with patients and their family members. Patients must receive adequate training to self-administer medications upon discharge, therefore nurses must be knowledgeable about the many aspects of drug administration that include pharmacology, pharmacokinetics, safety practices, and legal aspects of medication administration along with anatomy and physiology and dosage calculations. Nurses must have specific knowledge concerning their patients’ diagnoses, allergies, diagnostics, and laboratory results (see Chapter 9).
Self-Administration of Medication
The Institute for Safe Medication Practices (ISMP) website offers a booklet for safe practices in self-medication administration for consumers and the health care professionals responsible for teaching and evaluating consumers. The free booklet is called “Your Medicine: Play It Safe,” available at https://www.ismp.org/consumers/safemeds.pdf.
Forms and Routes of Drug Administration
A variety of forms and routes are used for the administration of drugs. These include sublingual, buccal, oral (tablets, capsules, liquids, suspensions, and elixirs), transdermal, topical, instillation (drops and sprays), inhalation, nasogastric and gastrostomy tubes, suppositories, and parenteral forms (Fig. 10.1).

Tablets and Capsules
• Tablets and capsules are the most common drug forms; they are convenient and less expensive and do not require additional supplies for administration.
• Oral drugs are not given to patients who are vomiting, who lack a gag reflex, or who are comatose.
• Do not mix a drug with large amounts of foods or beverages. Patients may not be able to consume them and will not get the full dose of medication. Do not mix drugs in infant formula.
• Enteric-coated and timed-release capsules must be swallowed whole to maintain a therapeutic drug level. If crushed, the initial excessive drug release poses a risk of toxicity such that it could lead to a potentially fatal overdose. Crushing can increase the rate of absorption, and it can cause oropharyngeal irritation. To maintain a therapeutic drug level, enteric-coated and timed-release medications must be swallowed whole so the drug is released gradually. These medications should never be cut in half or crushed for administration. Advise the patient or family member to notify the health care provider or pharmacist if the patient is having difficulty swallowing the medication. Instruct the patient to never cut or crush medications unless advised by the health care provider or pharmacist that cutting or crushing is safe. In acute care settings, the nurse should follow the agency’s policy for changing or altering drugs. Most policies indicate to notify the health care provider or pharmacist if the patient is unable to swallow the drug. Many drugs can be given in liquid or intravenous (IV) form or in a non–extended-release form.
• Be aware of medications with “extended release” in the name that should never be cut in half or crushed (e.g., guaifenesin tablets can be changed to liquid form).
• Administer irritating drugs with food to decrease gastrointestinal (GI) discomfort.
• Administer drugs on an empty stomach if food interferes with medication absorption.
• Drugs given via sublingual (under the tongue) or buccal (between the cheek and gum) routes remain in place until fully absorbed, therefore no food or fluid should be taken while the medication is in place.
• If patients have difficulty opening child-resistant caps, have them request non–child-resistant caps from the pharmacist.
Liquids
• Forms of liquid medication include elixirs, emulsions, and suspensions. Elixirs are sweetened, hydroalcoholic liquids used in the preparation of oral liquid medications. Emulsions are a mixture of two liquids that are not mutually soluble. Suspensions are liquids in which particles are mixed but not dissolved.
• Read the labels to determine whether diluting or shaking is required.
• Make sure your facility has plastic dosing cups that measure in milliliters and not the archaic drams. One dram is equivalent to 3.7 mL. To avoid mix-ups, it is always best to measure the prescribed dose of liquid medication in a syringe calibrated for milliliters (mL) and to then squirt the medication into the oral measuring cup. According to the U.S. Pharmacopeial Convention (USP), a proposed change is required for all facilities to supply dosing cups with legible markings in metric units (Fig. 10.2).
Transdermals
• Transdermal medication is stored in a patch placed on the skin and is absorbed through the skin to produce a systemic effect. A patch may be left in place for as little as 12 hours or as long as 7 days depending on the drug. Transdermal drugs provide more consistent blood levels than oral and injectable forms, and they avoid GI absorption problems associated with oral products. To prevent skin breakdown, transdermal patches should be rotated to different sites and should not be reapplied over the exact same area every time. Additionally, the area should be thoroughly cleansed before administration of a new transdermal patch.
• Perform hand hygiene and apply gloves when administering medicated patches to prevent transfer of medication; advise the patient to do the same for self-administration. Never cut the patch in half.
• Advise patients to secure the patch with tape, being careful not to apply the tape too tightly, which could alter the drug delivery.
Topicals
• Topical medications are most frequently applied to the skin by painting or spreading the medication over an area and applying a moist dressing or leaving the area exposed to air. Such medications can be applied to the skin in several ways, such as with a glove, tongue blade, or cotton-tipped applicator. Nurses should never apply a topical medication without first protecting their own skin with gloves.
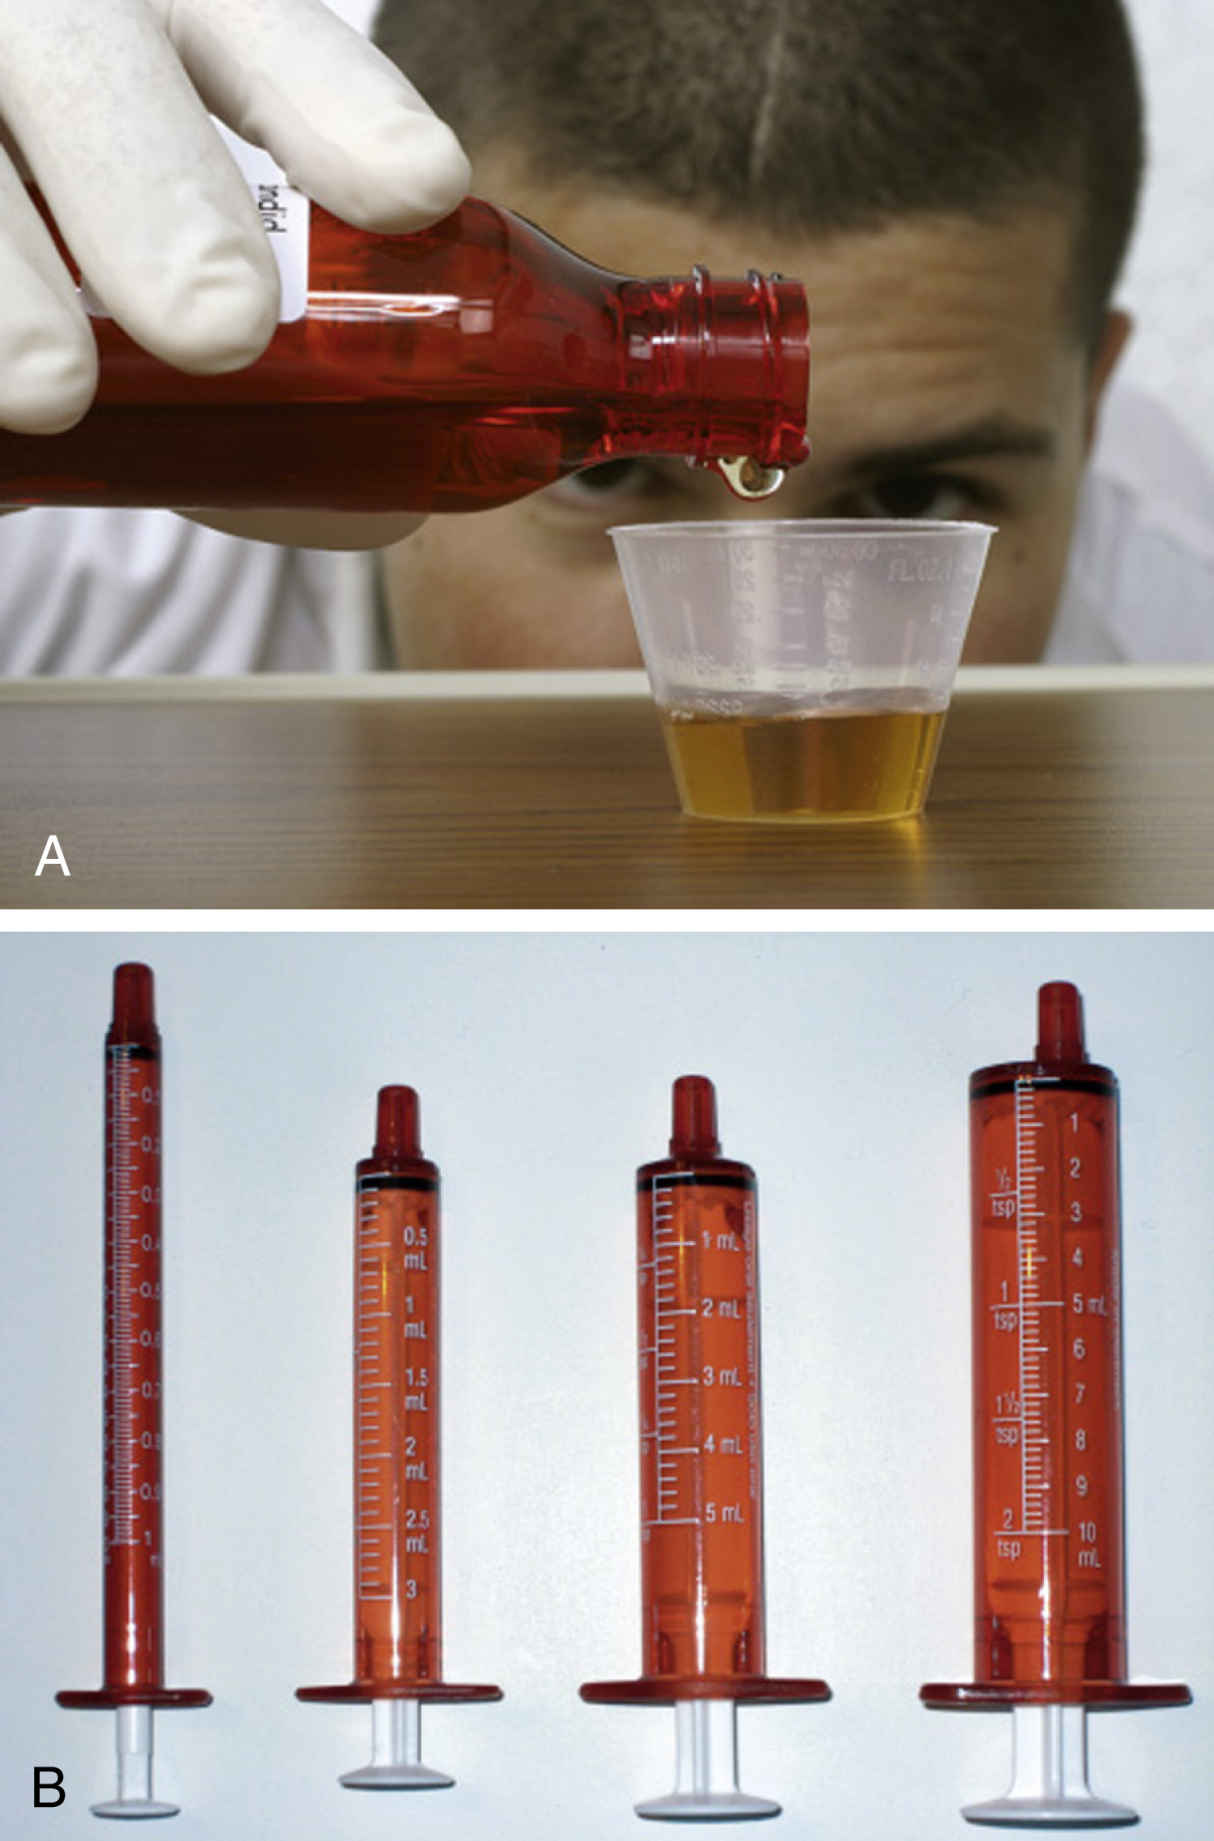
FIG. 10.2 A, Pour desired volume of liquid so base of meniscus is level with mL increment on plastic dosing cup. B, Measure liquid medication in a mL syringe and squirt liquid into dosing cup. From Potter, P. A., et al. (2017). Fundamentals of nursing (9th ed.). St. Louis: Elsevier.
• Use the appropriate technique to remove the medication from the container, and apply it to clean, dry skin when possible. Do not contaminate the drug in a container; instead, use gloves or an applicator.
• Gloves and applicators that come in contact with a patient should not be reinserted into the container. Estimate the amount needed and remove it from the container, or use a fresh sterile applicator each time the container is entered.
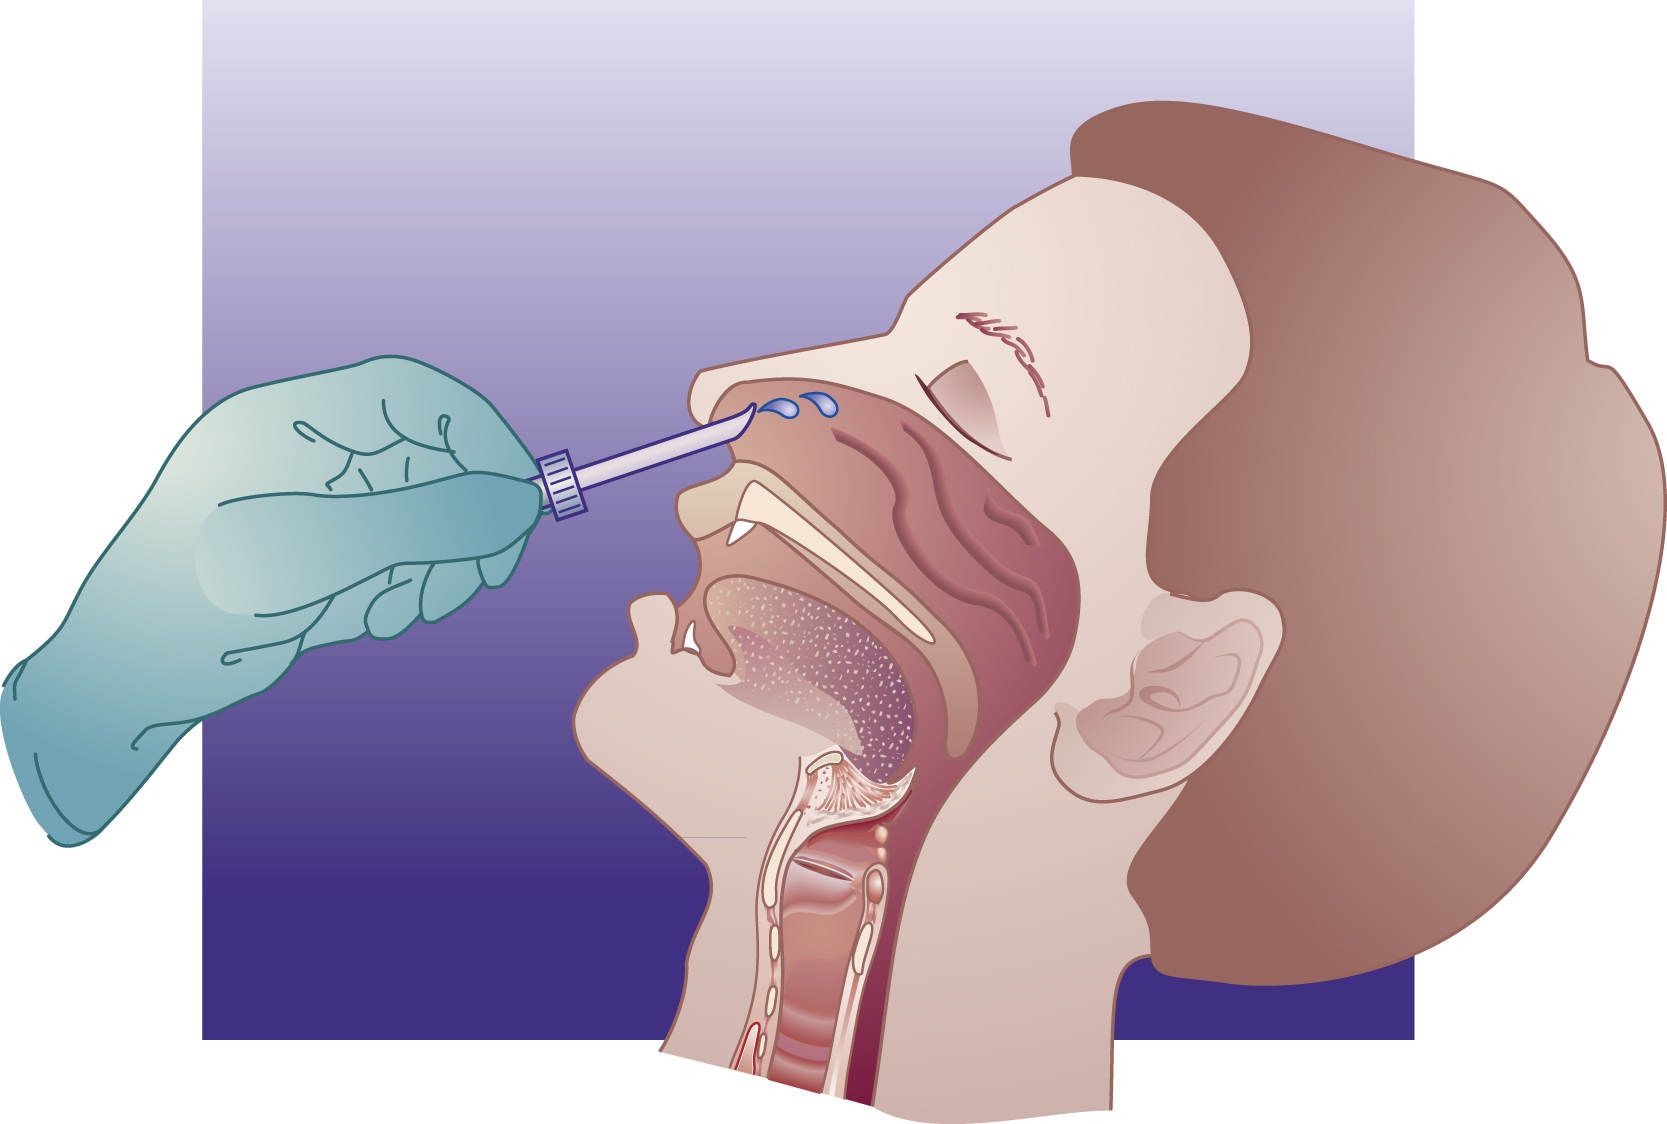
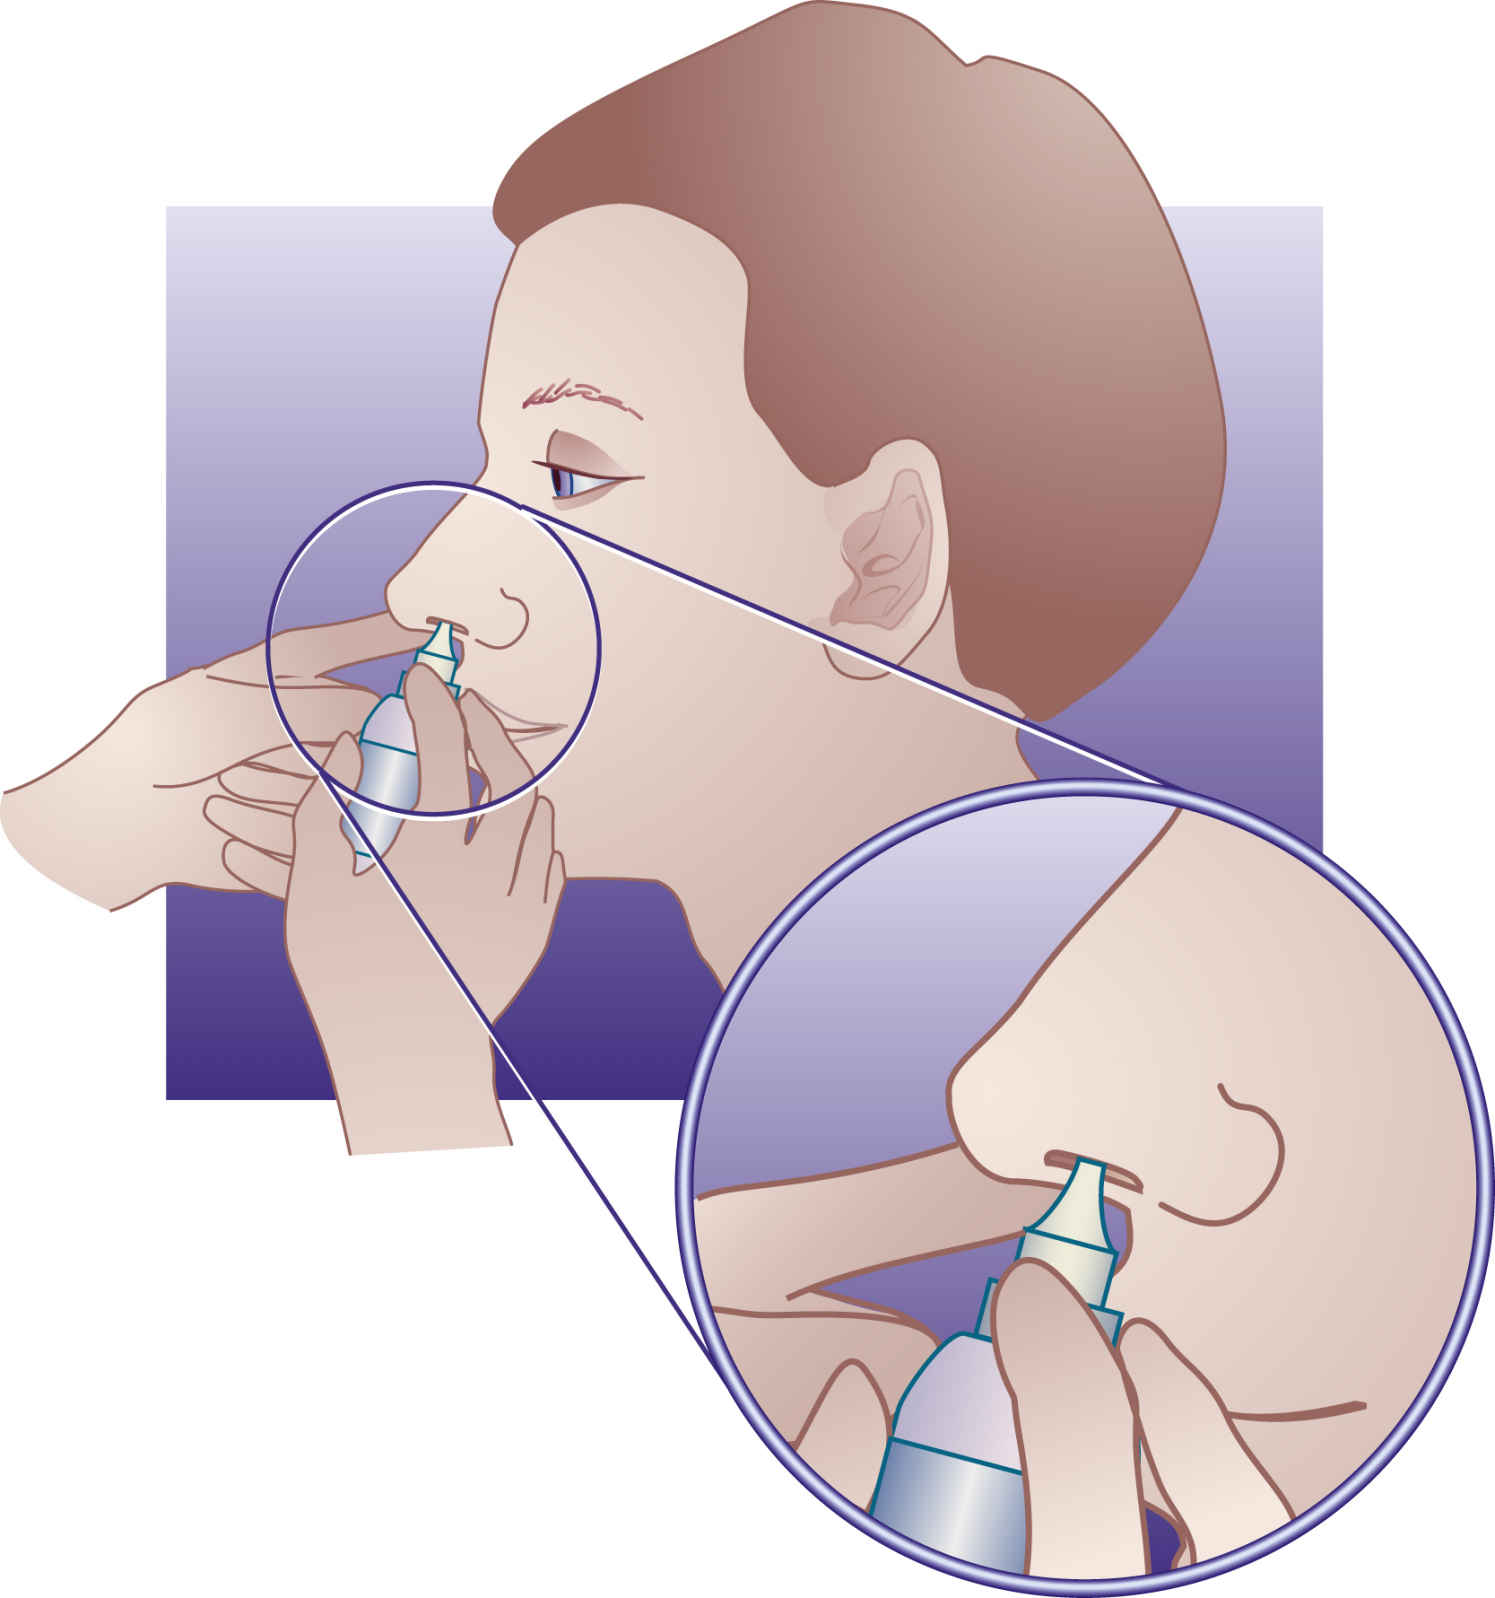
Instillations
Instillations are liquid medications usually administered as drops, ointments, or sprays in the following forms:
Inhalations
• Metered-dose inhalers (MDIs) are handheld devices used to deliver a number of commonly prescribed asthma and bronchitis drugs to the lower respiratory tract (Box 10.5) via inhalation. When the airway becomes constricted, the drug is needed quickly. When properly used, MDIs get up to 12% to 14% of the drug deep into the lungs with each puff. MDIs act faster than drugs taken by mouth, and fewer side effects occur because the drug goes right to the lungs and not to other parts of the body. Some MDIs have a counter to indicate the number of inhalations used. For those that do not, ask the pharmacist the number of inhalations the inhaler will provide, then count the number of inhalations used. Every effort should be made to have the patient know how much medication is in the canister and to anticipate and obtain refills in a timely manner.
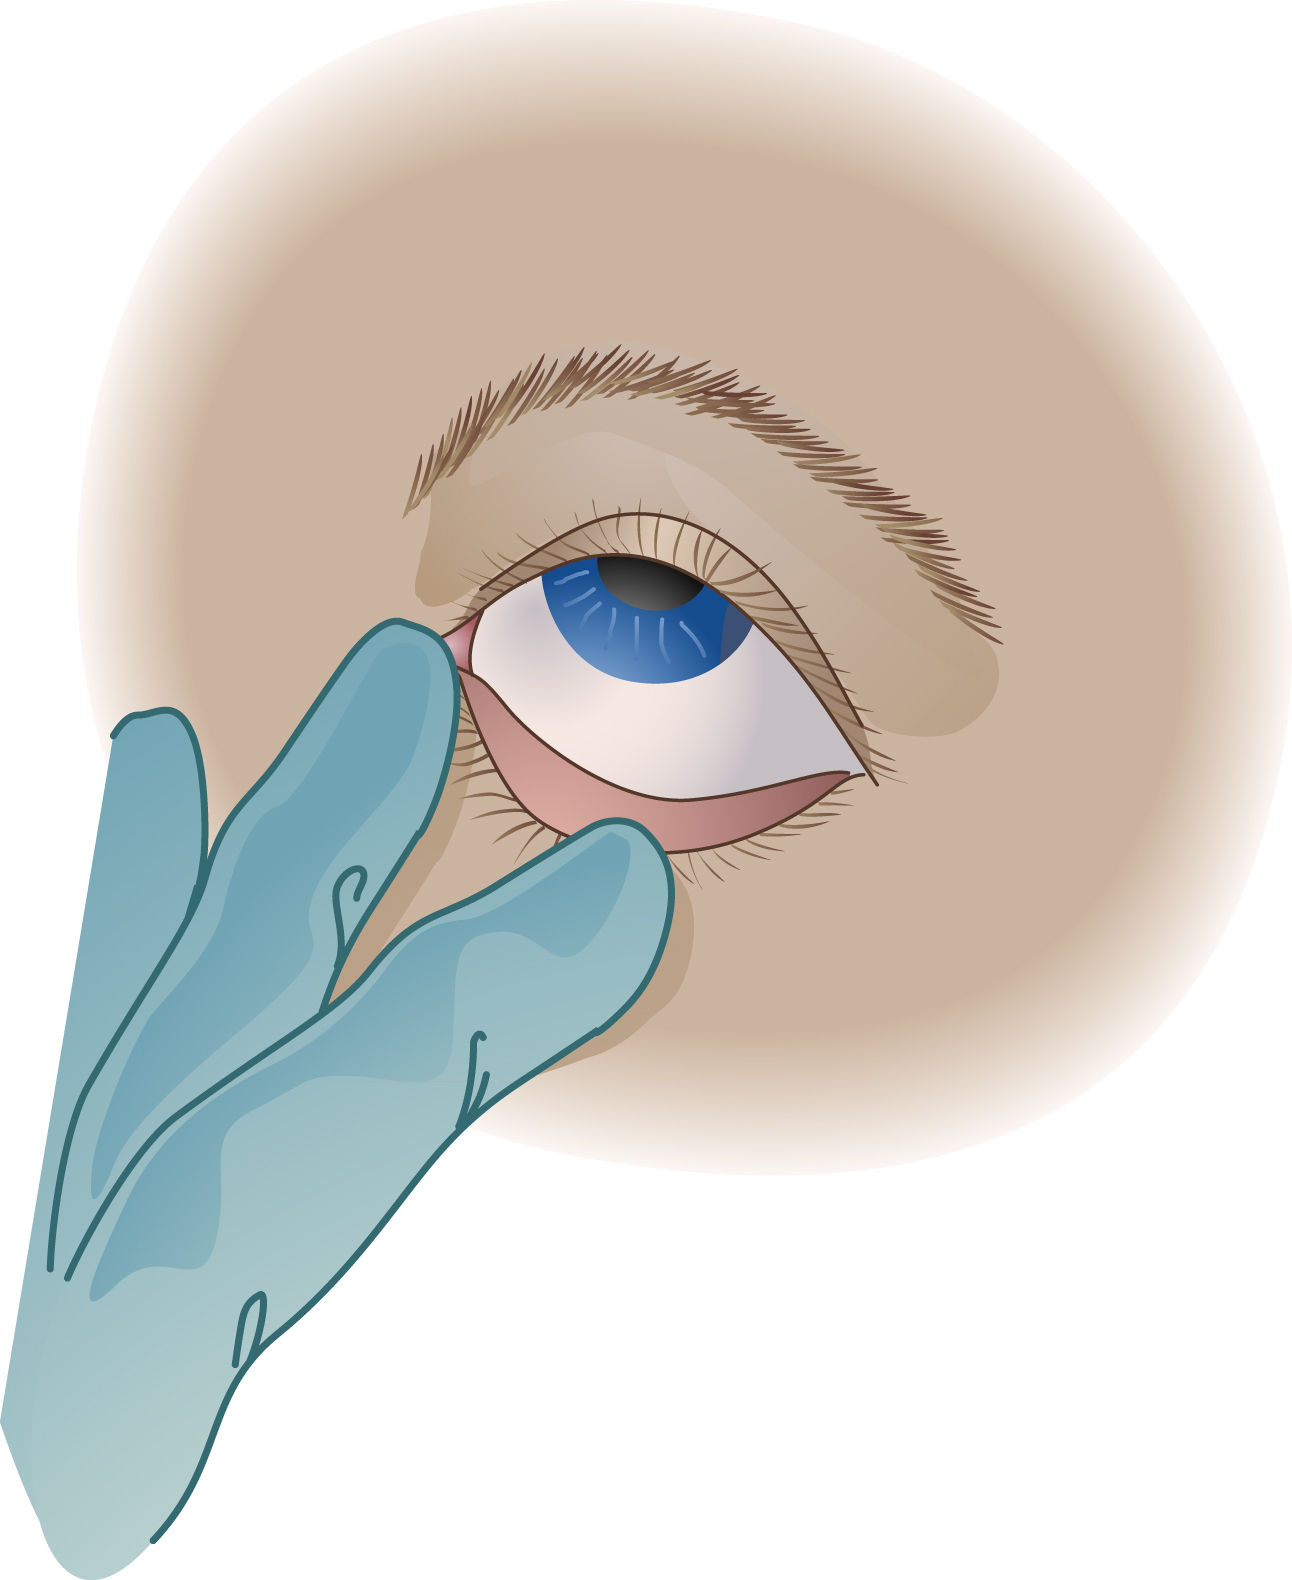
FIG. 10.3 Administering Eyedrops.
Gently pull down on the skin below the eye to expose the conjunctival sac. Apply drops to the middle third of the sac, and apply gentle pressure over the lacrimal duct after administration.
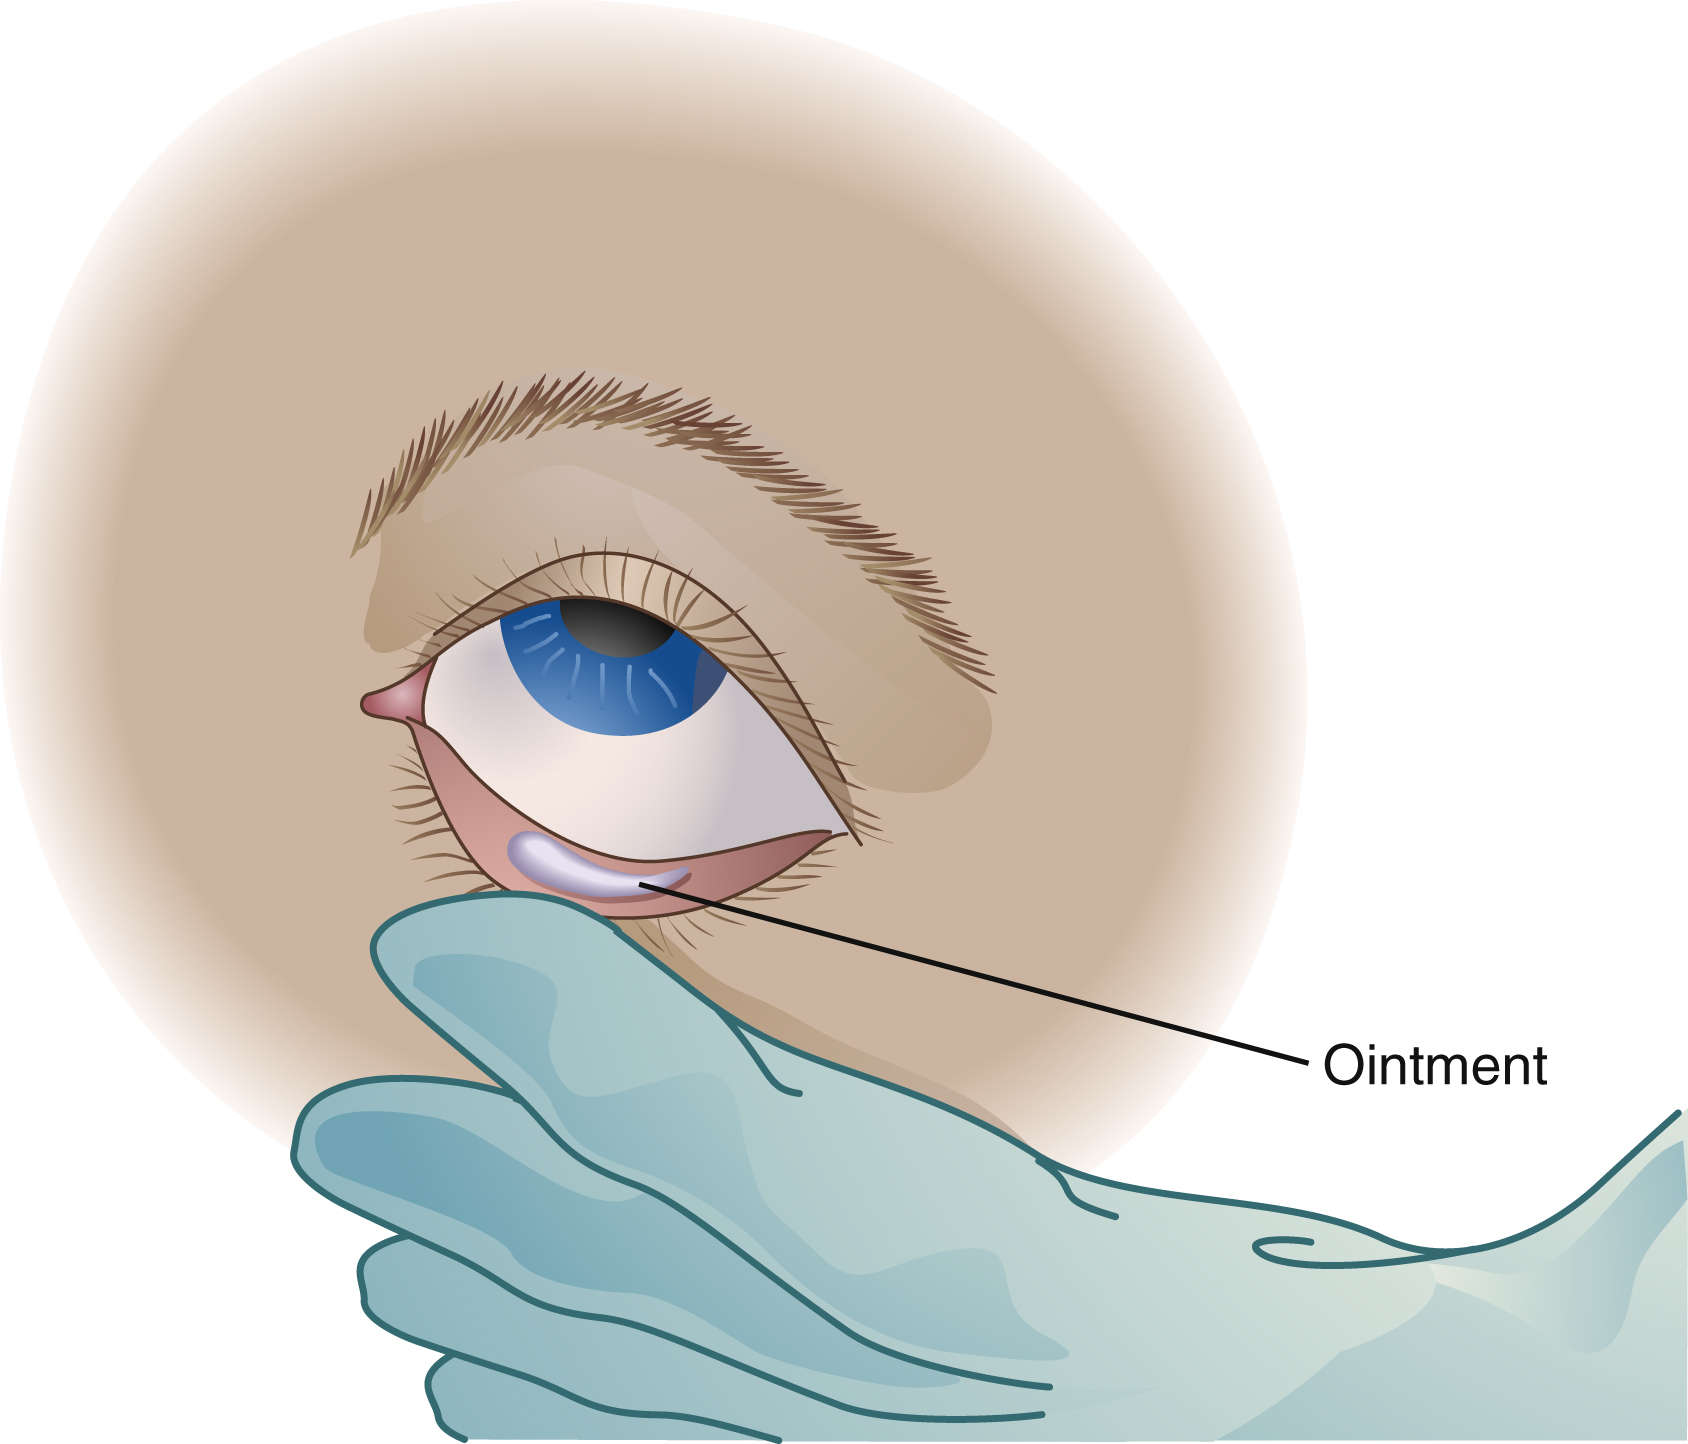
FIG. 10.4 Administering Eye Ointment.
Squeeze a ¼-inch–wide strip of ointment into the conjunctival sac.

FIG. 10.5 Administering Eardrops.
A, Straighten the external ear canal by pulling the auricle down and back in children under 3 years of age. B, In patients older than 3 years of age, including adults, pull the auricle upward and outward.
• Take special measures when handling the capsules used in some MDIs to prevent the transfer of medication (e.g., powder from a punctured capsule can get on the nurse’s hands and transfer to the eyes or absorb into the skin).
• Spacers are devices used to enhance the delivery of medications from the MDI (Fig. 10.8). A nebulizer is a device that changes a liquid medication into a fine mist or aerosol that has the ability to reach the lower, smaller airways. Handheld nebulizers deliver a very fine particle in a spray of medication.
• When administering drugs via an MDI or nebulizer, the preferred patient position is the semi-Fowler or high Fowler position.
• Instruct the patient on the correct use and cleaning of MDIs or nebulizers.
Nasogastric and Gastrostomy Tubes
• Before administering drugs, always check for proper tube placement of any feeding tube that enters the mouth, nose, or abdomen, and always assess the gastric residual. Return any aspirated gastric fluid to the stomach. (Check the agency’s policy for tube placement and residual; see Chapter 14.)
• Place patient in a high Fowler position or elevate the head of bed at least 30 degrees to avoid aspiration.
• Make sure the drug is crushable. If it is a capsule, assess whether it can be opened to be administered through the tube.
• Remove the plunger from the syringe and attach it to the feeding tube, release the clamp, and allow the medication to flow in properly by gravity.
• Ensure proper identification of each drug up until the time of administration. Do this by administering one drug at a time. Flush with 10 to 15 mL of water in between each administration to maintain patency of the tubing.
1. Explain what a metered dose is, and warn the patient about overuse and side effects of the drug.
2. Explain the steps for administering drug using a squeeze-and-breathe metered-dose inhaler (MDI), and demonstrate the steps when possible. Consult a pharmacist for details if necessary.
3. Insert the medication canister into the plastic holder.
4. If a spacer is used, insert the MDI into the end of the spacer.
5. Shake the inhaler vigorously five or six times before using. Remove the cap from the mouthpiece.
6. Have the patient breathe out through the mouth and exhale.
7. An MDI may be positioned in one of two ways:
a. With the mouth closed around the MDI with the opening toward the back of the throat
b. With the device positioned 1 to 2 inches from the mouth
c. If a spacer is used, the patient closes the mouth around the mouthpiece of the spacer. Avoid covering the small exhalation slots with the lips.
8. With the inhaler properly positioned, have the patient hold the inhaler with the thumb at the mouthpiece and the index finger and middle finger at the top (see Fig. 10.8).
9. Instruct the patient to take a slow, deep breath through the mouth and during inspiration, to push the top of the medication canister once.
10. Have patients hold the breath for 10 seconds then exhale slowly through pursed lips.
11. If a second dose is required, wait 1 to 2 minutes, and repeat the procedure by first shaking the canister in the plastic holder with the cap on.
12. When it is first used or if it has not been used recently, test the inhaler by spraying it into the air before administering the metered dose.
13. If a glucocorticoid inhalant is to be used with a bronchodilator, wait 5 minutes before using an inhaler that contains a steroid.
14. Teach patients to self-monitor their pulse rate.
15. Caution against overuse because side effects and tolerance may result.
16. Teach patients to monitor the amount of medication remaining in the canister. Advise patients to ask a health care provider or pharmacist to estimate when a new inhaler will be needed based on the dosing schedule.
Stay updated, free articles. Join our Telegram channel

Full access? Get Clinical Tree


