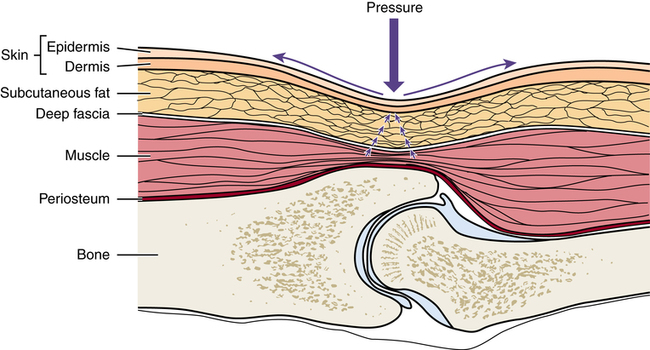
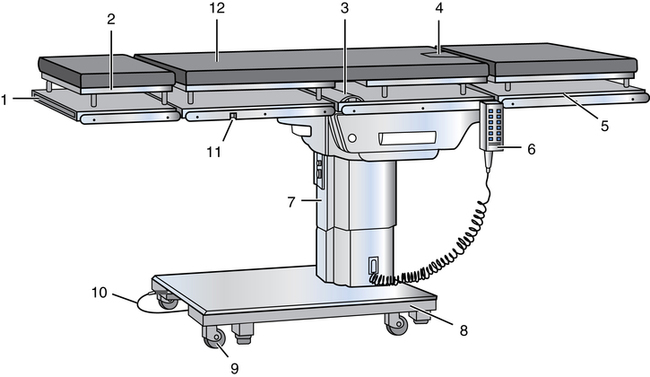
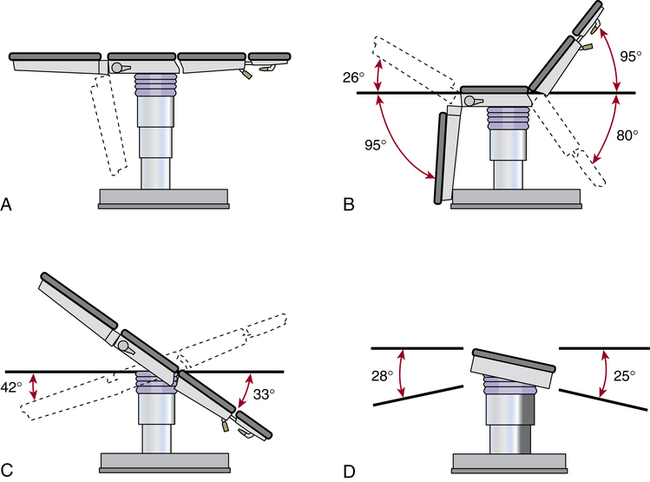
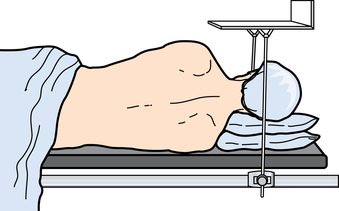
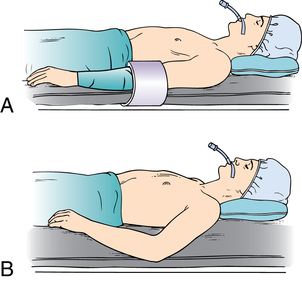
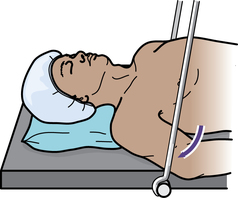
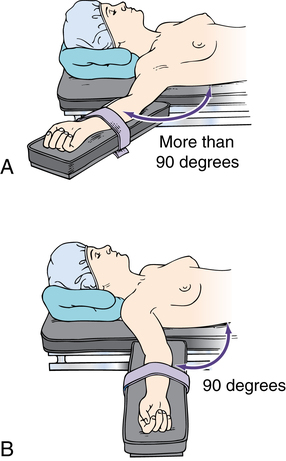
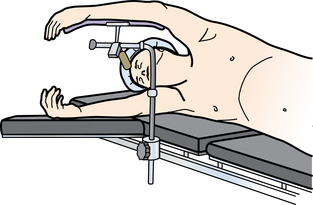
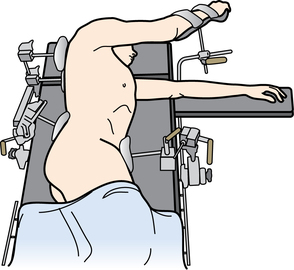
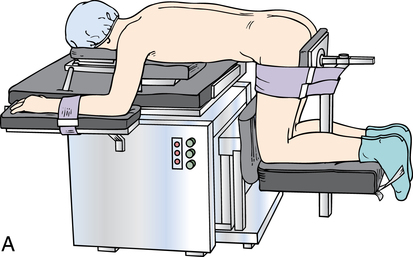
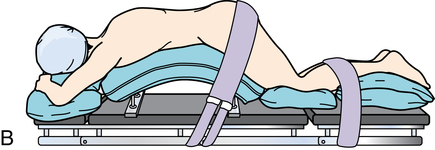
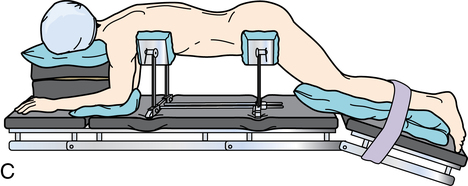
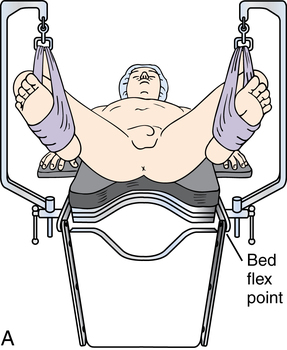
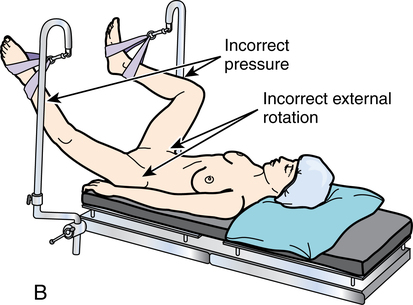
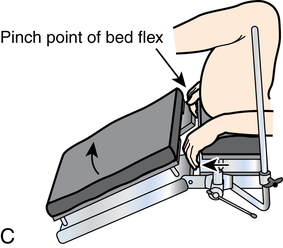
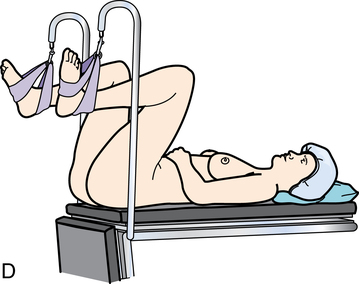
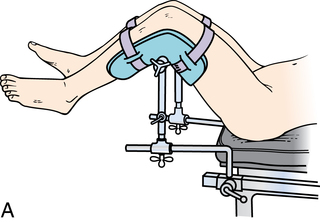
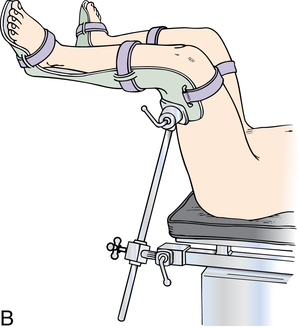
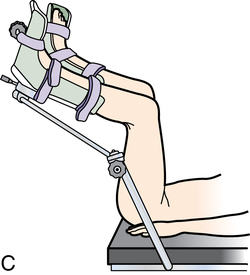
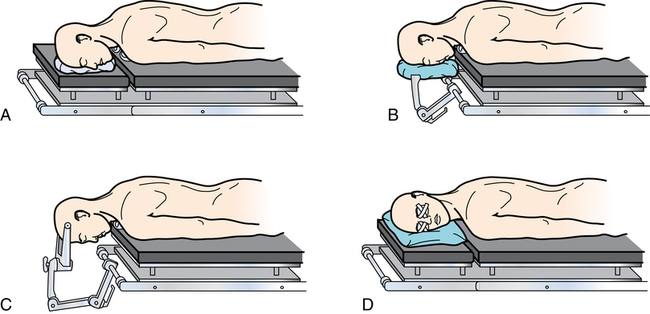
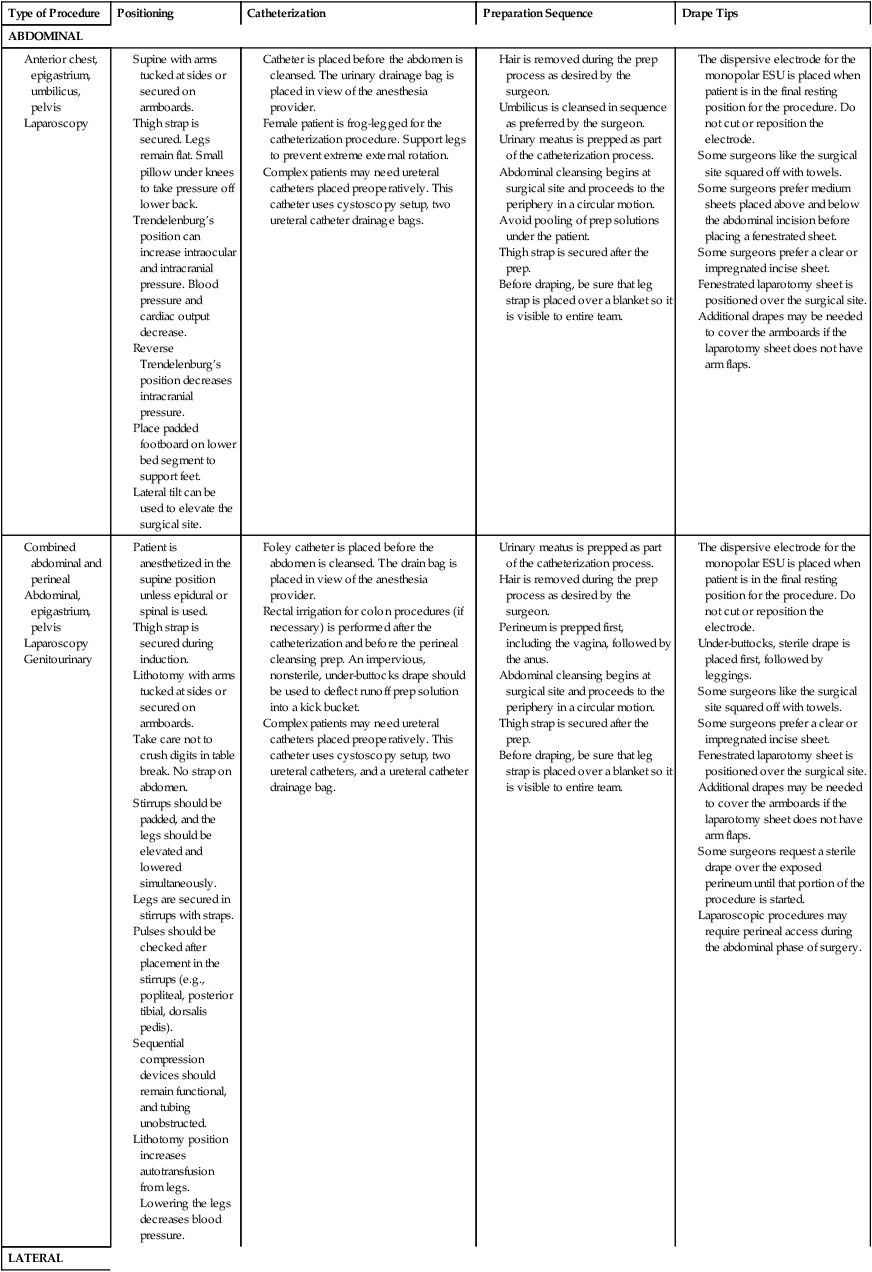
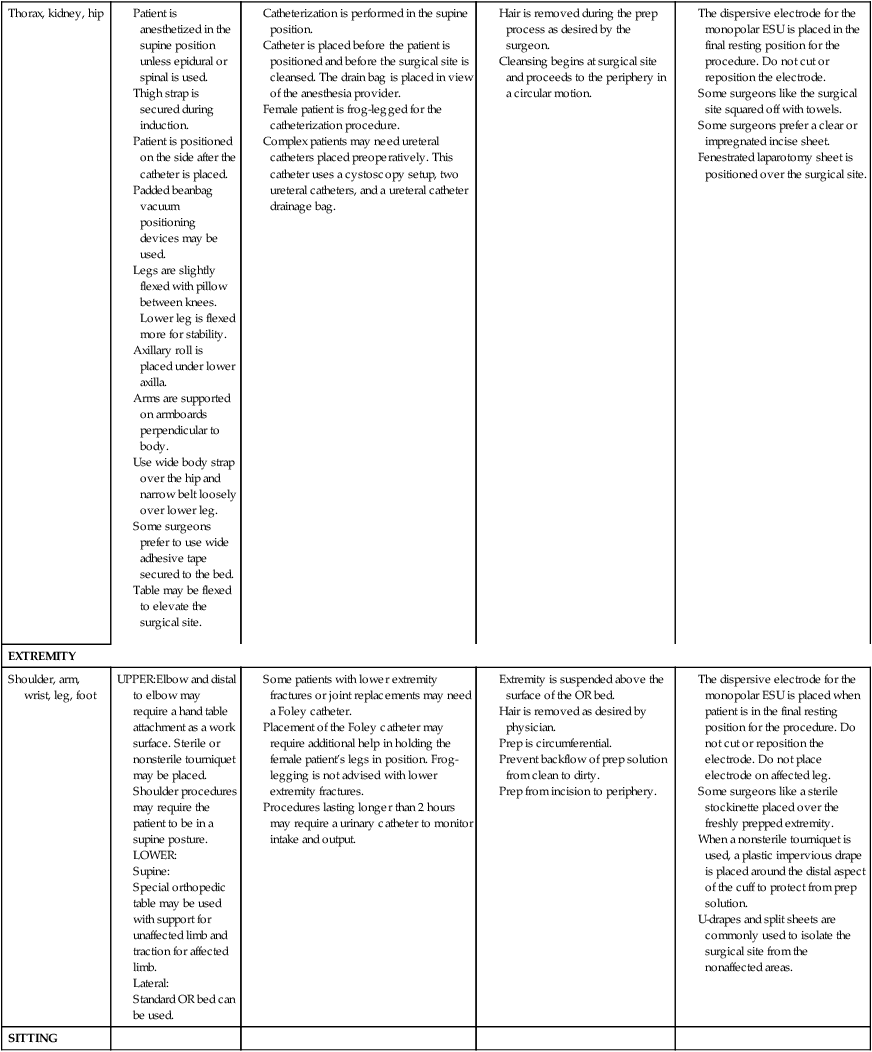
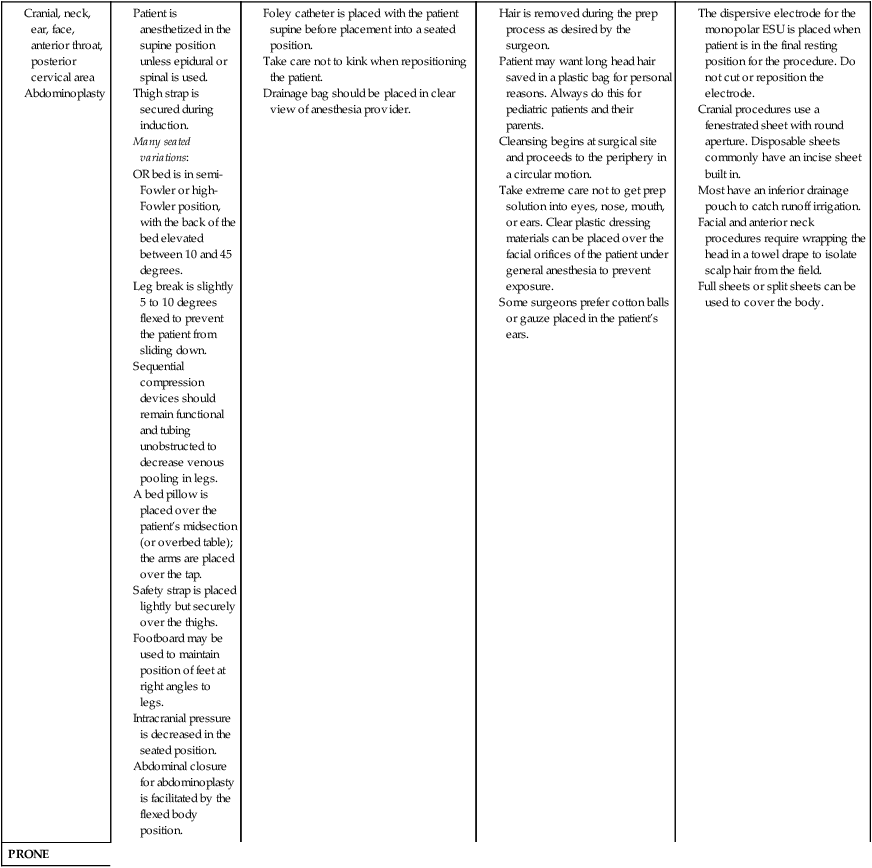
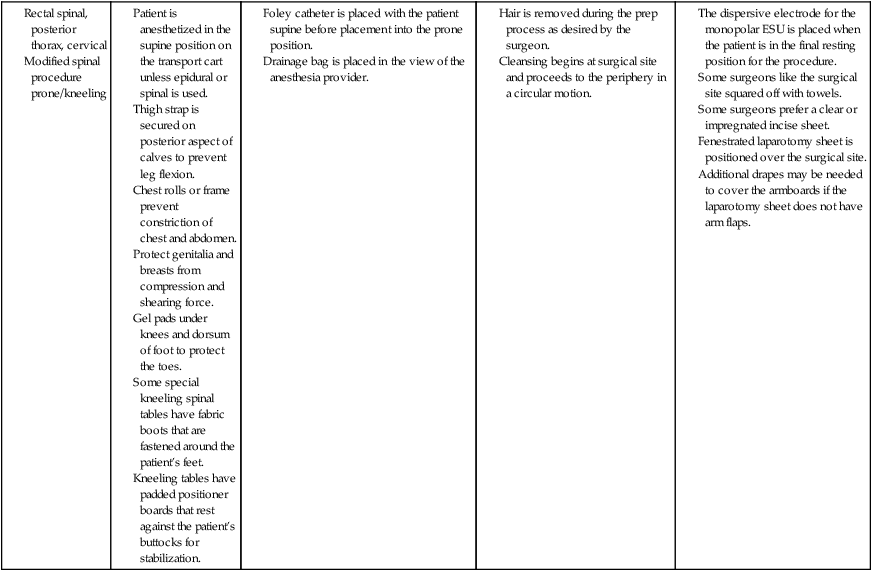
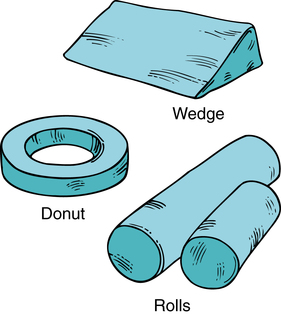
Chapter 26 After studying this chapter, the learner will be able to: • Identify the safety hazards associated with moving a patient from one surface to another. • List the anatomic considerations for positioning. • Describe the effects of positioning on the patient’s body systems. • Identify key elements of preoperative skin preparation of patients. • Discuss the implications of chemical and mechanical actions of prepping the patient. Move away from the body. Move toward the body. In front of. Topical cleansing chemical used to decrease the microbial count on the skin surface. Generalized physiologic configuration of the patient’s size, weight, and shape. Toward the foot of the patient. Toward the head of the patient. Rotate a joint in a circumferential axis (usually a ball joint). The surface area of the patient’s skin that encompasses a limb or other rounded tissue area. Below the surface layers. Away from the core. Back of a part. Flatten a joint (zero-degree flexion). Bend at a normal joint, close the angle of the joint. Move away from the body in a line more than a safe 90-degree angle. Move toward the body, crossing over the neutral plane of the body. Move beyond the normal flattening of a joint axis. Below or beneath. Toward the side of the patient. Toward the midline. Behind. Face down. Closer to the core. Reverse Trendelenburg’s position Head-elevated position. On the surface. Above. Face up. Head-down position. Front surface. Positioning for a surgical procedure is important to the patient’s outcome. Proper positioning facilitates preoperative skin preparation and appropriate draping with sterile drapes. Positioning requires a detailed knowledge of anatomy and physiologic principles and familiarity with the necessary equipment. Safety is a prime consideration. Efficiency of the patient preparation process can be attained by organizing activities in a logical sequence. Table 26-1 illustrates how to coordinate and organize patient preparation activities. TABLE 26-1 Planning the Organization of Patient Positioning, Prepping, and Draping The main objectives for any surgical or procedural positioning are as follows: • Optimize surgical-site exposure for the surgeon. • Minimize the risk for adverse physiologic effects. • Facilitate physiologic monitoring by the anesthesia provider. Before the patient is brought into the OR, the circulating nurse should do the following: 1. Review the proposed position by referring to the procedure book and the surgeon’s preference card in comparison with the scheduled procedure. 2. Ask the surgeon for assistance if unsure how to position the patient. 3. Assess for any patient-specific positioning needs. 4. Check the working parts of the OR bed before bringing the patient into the room.3 5. Assemble and test all table attachments and protective pads anticipated for the surgical procedure and have them immediately available for use. Box 26-1 lists areas that may need specific attention during padding. 1. The patient is properly identified before being transferred to the OR bed, and the surgical site is confirmed according to facility policy. The surgeon is required to label the correct site. 2. The patient is assessed for mobility status, which includes determination of the patient’s ability to transfer between the transport cart and the OR bed. Do not plan to have patients move themselves toward an affected limb or toward the blinded eye. 3. The OR bed and transport vehicle are securely locked in position, with the mattress stabilized during transfer to and from the OR bed. Untie the ties of the patient’s gown, and take care not to allow the patient’s gown or blanket to become lodged between the two surfaces or under the bottom of a moving patient. Velcro strips or other means should be used to maintain the stability of the mattresses of the two surfaces. 4. Two people should assist an awake patient with the transfer by positioning themselves on each side of the patient’s transfer path. The person on the side of the transport cart assists the patient in moving toward the OR bed. The person on the opposite side prevents the patient from falling over the edge of the OR bed. 5. Adequate assistance in lifting unconscious, anesthetized, obese, or weak patients is necessary to prevent injury. A minimum of four people is recommended, and transfer devices and lifters may be used. The patient is moved on the count of three, with the anesthesia provider giving the signal. Sliding or pulling the patient may cause dermal abrasion or injury to soft tissues. Dependent limbs can create a counterbalance and cause the patient to fall to the floor. Examination gloves should be worn if the patient is incontinent or offers other risk of exposure to blood and body substances. 6. The anesthesia provider guards the head of the anesthetized patient at all times and supports it during movement. The head should be kept in a neutral axis and turned as little as possible to maintain the airway and cerebral circulation. 7. The physician assumes responsibility for protecting an unsplinted fracture during movement. 8. The anesthetized patient is not moved without permission of the anesthesia provider. 9. The anesthetized patient is moved slowly and gently to allow the circulatory system to adjust and to control the body during movement. 10. No body part should extend beyond the edges of the OR bed or contact metal parts or unpadded surfaces. 11. Body exposure should be minimal to prevent hypothermia and preserve dignity. 12. Movement and positioning should not obstruct or dislodge catheters, intravenous (IV) infusion tubing, oxygen cannulas, and monitors. 13. The armboard is protected to avoid hyperextending the arm or dislodging the IV cannula. The surface of the armboard pad and the mattress of the OR bed should be of equal height. Hyperabduction is avoided to prevent brachial plexus stretch.6–8,11 14. When the patient is supine (on the back), the ankles and legs must not be crossed. Crossing of the ankles and legs creates occlusive pressure on blood vessels and nerves, and pressure necrosis may occur. The patient is then at risk for deep vein thrombosis (DVT). 15. When the patient is prone (on the abdomen), the thorax is relieved of pressure by using chest rolls (subclavicle to iliac crest) to facilitate chest expansion with respiration.4 The chest rolls should be adequately secured to the table to prevent shifting. The abdomen should remain dependent to decrease abdominal venous pressure. Padding should be placed at the dorsum of the feet to prevent pressure on the toes. In the event of cardiac arrest, a transport cart should be available for immediate emergency repositioning into the supine position and for subsequent resuscitation. 16. When the patient is positioned lateral (on the side), a pillow is placed lengthwise between the legs to prevent pressure on bony prominences, blood vessels, and nerves. This positioning also relieves pressure on the superior hip.10 Pressure reduction padding is placed beneath the axilla on the unaffected side to protect the arm from body weight. 17. During articulation of the OR bed, the patient is protected from crush injury at the flex points of the OR bed. 18. When the OR bed is elevated, the patient’s feet and protuberant parts are protected from compression by overbed tables, Mayo stands, and retractor frames. An adequate clearance of 2 to 3 inches is maintained. 19. Surfaces should not create pressure on any body part. Alternating or pressure-relieving surfaces should be used. Rolled blankets and towels can create pressure because they do not allow for relief of compression at the contact surface. A gel pad or other alternating pressure pad should be used. Figure 26-1 depicts the tissue layers as they are compressed against a bony prominence. A patient’s tolerance of the stresses of the surgical procedure depends greatly on normal functioning of the vital systems. The patient’s physical condition is considered, and proper body alignment is important. Criteria are met for physiologic positioning to prevent injury from pressure, crushing, pinching, obstruction, and stretching. Each body system is considered when planning the patient’s position for the surgical procedure. Complications of positioning are listed in Box 26-2. Prolonged pressure on or stretching of the peripheral nerves can result in injuries that range from sensory and motor loss to paralysis and muscle wasting.11 The extremities, and the body, should be well supported at all times. The most common sites of injury in the upper body are the divisions of the brachial plexus and the ulnar, radial, peroneal, and facial nerves; the axons may be stretched or disrupted. Extremes of position of the head and arm greater than 90 degrees can easily injure the brachial plexus. Many different OR beds with suitable attachments are available, and practice is necessary to master the adjustments. OR beds are versatile and adaptable to a number of diversified positions for many surgical specialties; orthopedic, urologic, and fluoroscopic tables are often used for specialized procedures. Figure 26-2 depicts a typical general-purpose OR bed. The surface of the OR bed is divided into three or more hinged sections: the head, the body, and the leg sections. The joints of the OR bed are referred to as breaks. Each hinged section can be manipulated, flexed, or extended to the desired position in a procedure called breaking the OR bed. Figure 26-3 shows the range of flexibility of an average general-purpose OR bed. The safety belt is used during surgical procedures except for certain positions (e.g., lithotomy and seated). Belting across the patient’s abdomen during the lithotomy position can cause compression of the abdominal structures.2 The safety belt is used before and after the procedure, when the patient’s legs are in the down position. A double-layer sheet is placed horizontally across the top of a clean sheet on the OR bed. After patients are transferred to the OR bed, their arms are enclosed in the lower flaps of this sheet, with the palms against the sides in a natural position and the fingers extended along the length of the body. The upper flaps are brought down over the arms and tucked under the patient’s sides. The sheet should not be tucked under the sides of the mattress because the combined weight of the mattress and the patient’s torso may impair circulation or cause nerve torsion. The full length of each arm is supported at the patient’s side, protected from injury, and secured. The hands should not extend into the flex point of the bed or a crush injury may ensue. In addition, a plastic curved shield, referred to as a sled, can be used to protect and secure the arms from injury (Fig. 26-5). Tucking of the patient’s arms and use of a sled help to prevent inadvertent pressure from upright bars of anesthesia screens, table attachments, and stationary retractor poles (Fig. 26-6). An adjustable arched spinal frame consists of two padded arches mounted on a frame that is attached to the OR bed. The patient is placed in the prone position with the abdomen over this device (referred to as a Wilson frame). The pads extend from the shoulders to the thighs, with the abdomen hanging dependently between the arches. The desired degree of flexion for spinal procedures is achieved by adjusting the height of the arch by means of a crank. Other types of prone positioning frames are available (Fig. 26-10). Metal stirrup posts are placed in holders, one on each side rail of the OR bed, to support the legs and feet in the lithotomy position. The feet are supported with canvas or fabric loops that suspend the legs at a right angle to the feet. These stirrups are sometimes called candy cane or sling stirrups (Fig. 26-11). During extensive surgery, special leg holders may be used to support the lower legs and feet (e.g., Allen or Yellow Fin). Also available are metal or high-impact-plastic knee-crutch stirrups that can be adjusted for knee flexion and extension. Even if well padded, these stirrups may create some pressure on the back of the knees and lower extremities and may jeopardize the popliteal vessels and nerves. Gel and foam pads are available for patient protection when stirrups are used (Fig. 26-12). Headrests can be shaped like a donut or horseshoe for head and neck procedures; other styles are flat or concave to stabilize the head and neck in alignment. Nonpadded metal headrests have sterile skull pins that are inserted into the patient’s head for neurologic procedures (Fig. 26-13). Bolsters are used to elevate a specific part of the body (e.g., Kraske pillow to elevate the buttocks for anal procedures). Solid rolls of blankets or firm foam under each side of a patient’s chest, referred to as chest rolls, raise the chest off the OR bed to facilitate respiration. Large gel rolls also can be used for this purpose and for axillary elevation during lateral positioning. Commercially available bolsters and elevating pads are commonly used. Because patients may have a latex sensitivity, the manufacturer’s literature should be checked for latex content (Fig. 26-14).
Positioning, prepping, and draping the patient
Preliminary considerations
Preparations for positioning
Safety measures
Anatomic and physiologic considerations
Peripheral nerve considerations
Equipment for positioning
OR bed
Special equipment and bed attachments
Safety belt (thigh strap).
Lift sheet (drawsheet).
Adjustable arched spinal frame.
Stirrups.
Headrests.
Accessories.
![]()
Stay updated, free articles. Join our Telegram channel

Full access? Get Clinical Tree


Positioning, prepping, and draping the patient

 Website