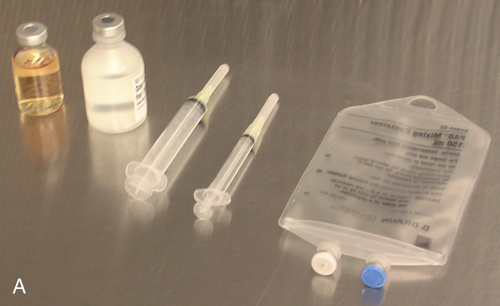
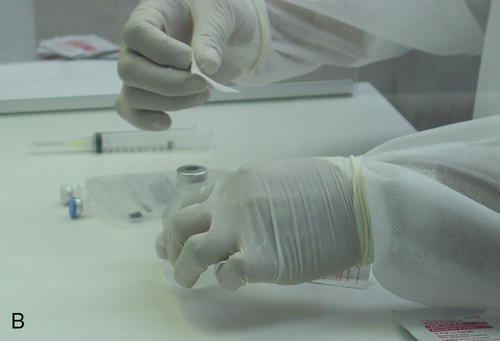
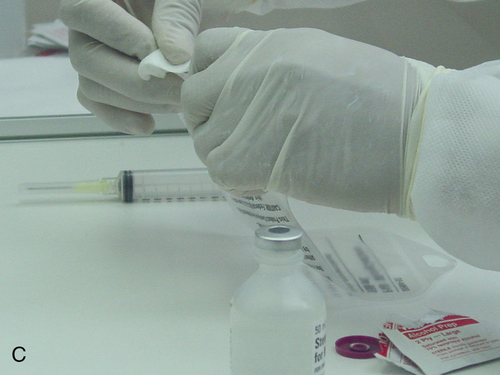
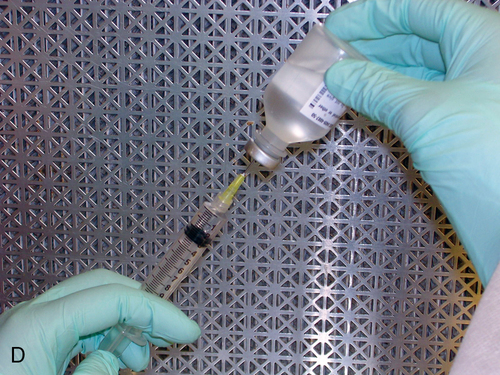
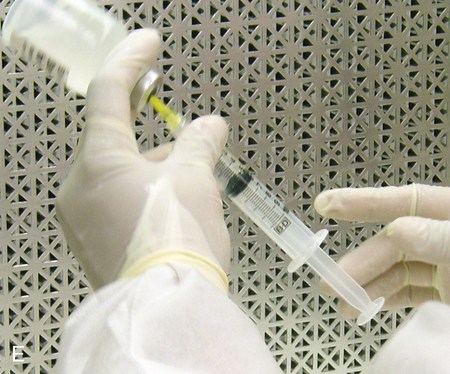
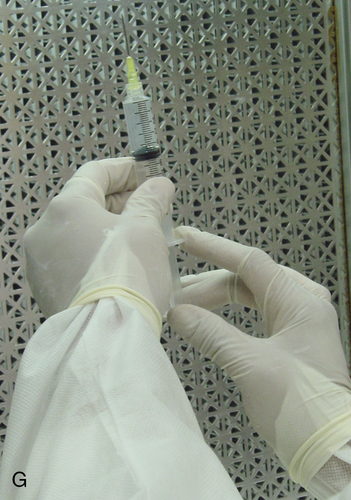
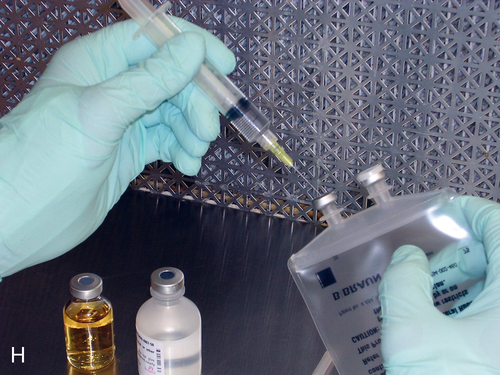
Techniques for preparing intravenous admixtures


Techniques for preparing intravenous admixtures


Introduction


Aseptic technique requires sterile equipment and a sterile environment, but it also includes manipulations that ensure sterility. Areas known as critical sites should never be touched in order to prevent contamination. These include tips of syringes, hubs of needles, ports of bags, tops of vials, and ends of filters or dispensing pins. Good hand placement will ensure the avoidance of contact to these areas as well as maintaining an open, direct path for first air in the laminar airflow workbench (LAFW) across these surfaces.


Before any manipulations can occur, certain tasks must be performed. Handwashing and garbing using the USP 797 guidelines are essential as well as cleaning the LAFW (see Chapter 6 for procedures). Technicians must understand these procedures and follow them in order to prevent contamination and subsequently avoid harm to the patient. We will discuss various techniques used in aseptic preparation, as well as manipulation of the equipment, in this chapter.


Aseptic technique is performed in the Class 5 environment, or clean room. Once proper handwashing and garbing is completed, the preparer begins the process of aseptic technique in the LAFW. The area where all aseptic manipulation takes place is the direct compounding area (DCA). Items are placed in the DCA one at a time by using a specific procedure.


First, only those items necessary should be placed in the DCA and excess paper items, such as alcohol pad paper and outer wrappers, are discarded on the outside. Each item used during aseptic manipulation, including syringes, needles, and medication vials, are sprayed with 70% isopropyl alcohol (IPA) and wiped down at the edge of the LAFW. Sterile supplies are removed from their outer wrappings at the edge of the DCA as they are introduced into the International Organization for Standardization (ISO) Class 5 area environment (LAFW, or biological safety cabinet [BSC]). All items are spread out at least 6 inches apart to ensure that there is sufficient space to work between them without disrupting the airflow or first air. In addition, items are kept at least 3 inches from the back and sides, and all manipulations are at least 6 inches inside the hood. Leave a workspace, which is not directly over the components, left open for the actual manipulations to take place. This will ensure that first air is never interrupted by an item placed in the DCA. Stage or place items on either side of this open area to avoid disruption of airflow.


Equipment used in aseptic manipulations


Good hand placement is essential to proper aseptic technique. Not only must the technician ensure that the “first air” is not compromised, but there are critical areas of the equipment that must never be touched. For example, when working with a syringe, the plunger and tip should never be touched. Needle hubs should also never be touched. If these areas are touched or blocked from first air, they can become contaminated.


To properly attach a needle to a syringe, remove the protective outer wrapping without compromising the critical areas. When pulling back the plunger of the syringe, hold only the flat knob at the end.


Ampule necks and vial tops should be disinfected with sterile 70% IPA swabs. This should be done by making one gentle stroke across the surface, disposing of the swab, and allowing the area to dry. These surfaces are considered critical sites because they are a fluid pathway surface. They should be wet for at least 10 seconds and allowed to dry so that microorganisms are eliminated (discussed in Chapter 6). Equipment, such as needles, syringes, and tubing, is packaged in protective covering from the manufacturer and is disposable.


Many syringes are manufactured with a locking mechanism designed to connect to the needle. When you attach a needle to this Luer-Lok system, it requires a slight turn, and then the needle is “locked” into place. There are other syringes known as slip-tip, which just hold the needle on by friction.


Removing an air bubble


A common problem when using a syringe to withdraw a solution from a vial is that air bubbles can form in the barrel. These will prevent accurate measurements and must be removed.


First, hold the syringe upright and pull back the plunger slightly to allow a space for the bubble to go to the top. Firmly tap the sides of the syringe to allow the bubble to travel to the top. Expel the air in the syringe by slowly pushing the plunger up until the fluid fills the barrel completely. Read the measurement by looking at the rubber end of the plunger aligned with the graduations on the barrel.


A vial is a closed system, which means air is not free to go in and out of the container. Whenever a liquid is withdrawn from it, there must be an equal volume of air injected into it first. For example, if 3 mL of solution is needed, first inject 3 mL of air into the vial to replace this volume. This prevents a vacuum from forming and sucking the plunger back down, which will cause “spraying of the contents” upon withdrawal of the needle. If a vented needle is available, this procedure is not required because there will be no pressure build-up.


When inserting a needle into the rubber closure on a vial, the needle must never be “stabbed” into it. This can cause coring, which is when small pieces of the rubber closure get pushed into the solution and then possibly added to the bag. The needle should be placed at an angle with the bevel up. This will force the pieces away from the bevel. See Figure 7-1 for the step-by-step process to prepare a syringe.


Remember to ensure that first air is not interrupted, impeded, or diverted when setting up components in the DCA. Allow for approximately 6 inches between each item and 3 inches from the back of the hood. All supplies should be placed in the DCA so that clutter is reduced and maximum efficiency of workflow can occur. Now that we have discussed equipment, let’s put this all together and prepare some admixtures.


Before performing any aseptic manipulations, always perform proper handwashing and garbing in the ante area, and once in the buffer area, clean the LAFW.


Setting up equipment in a laminar airflow workbench


Ante area


Buffer area


• Spray hands with 70% IPA or disinfectant, allow to dry, and don sterile gloves.


• Spray gloved hands with alcohol, and allow to dry.


• Perform cleaning procedure for the LAFW.


• All supplies used in the DCA should be gathered and decontaminated by spraying or wiping the outer surface with sterile 70% IPA or removing the outer packaging at the edge of the DCA as it is entered into the aseptic workspace. This will aid in removing dust particles and any other contaminates.


• Attach the syringe to the needle inside the DCA without contact contamination or interruption of first air.


• Disinfect all critical sites using sterile 70% IPA alcohol wipes, and wait at least 10 seconds before use.


• Withdraw the correct volume of medication from the vial by injecting an equal or less amount of air into it first. (For example, if 2 mL are required, inject 2 mL of air into the vial and then withdraw the 2 mL of fluid.) Use the see-saw method to allow fluid and air to swap from the vial to the syringe.


• Replace the protective needle cover, and remove any air bubbles by gently tapping on the syringe. Air bubbles will cause the reading on the syringe to be inaccurate because it allows the air to take up space, and it reflects in the final measurement.


• Recheck all calculations.


If a medication is to be dispensed in a syringe, use the above steps to withdraw the contents and eliminate air bubbles. Attach a push-on or twist-on cap for delivery, and label.

Stay updated, free articles. Join our Telegram channel

Aug 9, 2016 | Posted by in PHARMACY | Comments Off on Techniques for preparing intravenous admixtures

Full access? Get Clinical Tree

Get Clinical Tree app for offline access