■ Ensure that the sight is at least 2 to 3 cm from the left costal margin for patient comfort.
■ Mark the spot with a marking pen or press the needleless tip of a Luer lock syringe into the skin to leave an indentation mark.
■ Insertion of a fine 25-gauge or 27-gauge needle, as used for infusion of local anesthesia, may be used to best identify the perfect placement position and tube track.
Optional Technique for Site Selection
■ For additional assurance that there is no intervening bowel between the tube site chosen by transillumination and the stomach, the following technique can be used.1
■ Using a 10-mL syringe with several milliliters of saline and a small-gauge needle, advance the needle perpendicularly through the abdominal wall at the spot previously chosen, keeping the plunger drawn back.
■ Watch the saline in the syringe for air bubbles. If the initial presentation of bubbles is seen at the same time the endoscopist sees the needle from inside the stomach, you can safely assume you have not passed through any bowel before entering the stomach.
■ If you see bubbles before the endoscopist sees the needle from inside the stomach, you may be passing through bowel and thus should choose another point of entry and repeat (FIG 2).
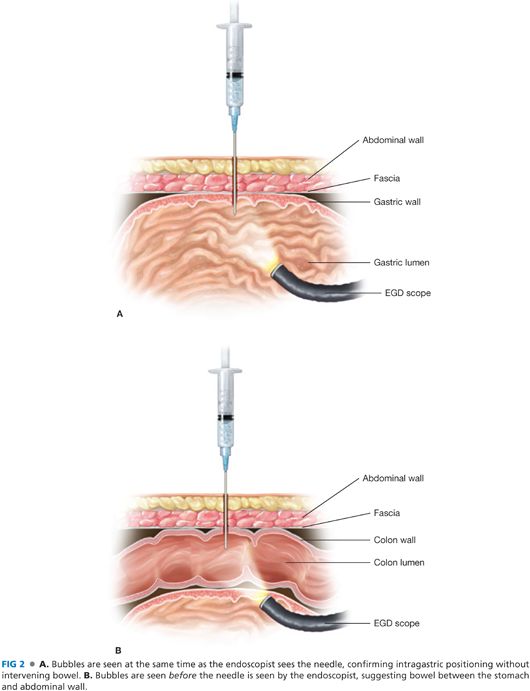
■ During this process, it is important to limit the force applied to the abdominal wall as this may compress a portion of an unexpected piece of bowel lying along the proposed track.
Tube Placement
■ Infiltrate the site chosen with local anesthetic and make an approximately 0.5-cm skin incision with a no. 11 blade.
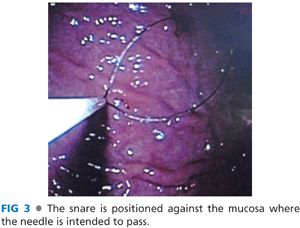
■ The endoscopist should advance the previously positioned polypectomy snare and center the loop over the area of the mucosa that was identified during abdominal wall site selection. This type of synchronization and planning not only facilitates a timely procedure but also avoids visceral movement once the best site is selected (FIG 3).
■ The needle with the angiocath is then placed through the abdominal wall at the designated site and advanced into the stomach under direct visualization into the loop created by the polypectomy snare. The needle is then removed while the angiocath is left in place (FIG 4A).
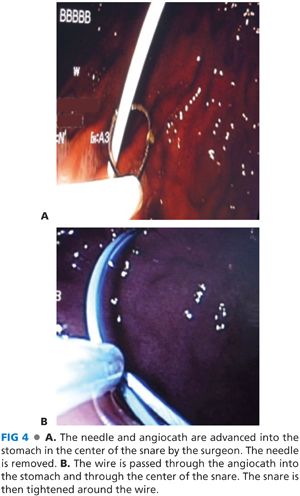
■ The snare is left loose.
■ The looped wire or the stiffer guidewire (see “Push Technique”) is advanced through the angiocath.
■ After several centimeters are passed through the snare, the snare loop is tightened around the wire (FIG 4B).
■ The scope is then completely withdrawn while the polypectomy snare is held snug around the wire, pulling the wire through the abdominal wall. This leaves the wire passing through the abdominal wall via the angiocath, into the stomach, through the esophagus, and out of the mouth.
■ At this point, there are two techniques available—“push” and “pull”—that can be chosen based on available supplies and surgeon’s preference.
Pull Technique
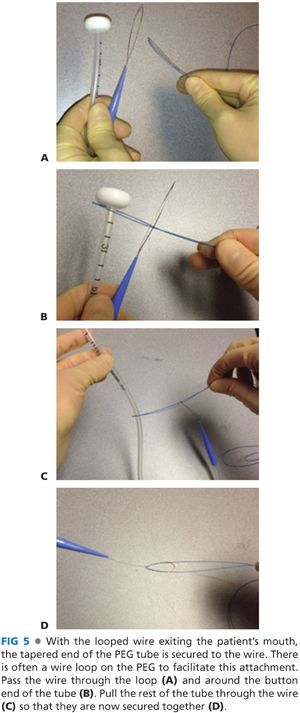
■ The looped wire that was pulled through the stomach to the mouth is connected to the looped wire at the tapered external end of the PEG tube (FIG 5).
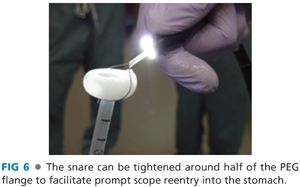
■ The surgeon then pulls the suture from the abdominal wall end, advancing the PEG tube through the esophagus into the stomach. The endoscopist should follow the tube down to visualize from within the stomach. To save time, the polypectomy snare can be cinched around half of the button of the PEG tube to allow the scope to easily follow the tube while it is being pulled by the surgeon (FIG 6).
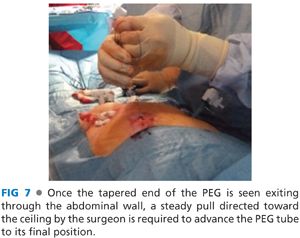
■ When the tapered end of the PEG tube begins to come through the abdominal wall, additional force directed perpendicular to the abdominal wall is required to pull the tube through (FIG 7).
■ The tube should be pulled until the button is resting loosely against the gastric mucosa.
■ The endoscopist should confirm position of the button to rule out bleeding while the surgeon notes the thickness of the abdominal wall when securing the bolster.
Push Technique
■ This technique requires a stiffer guidewire to be used.
■ The G-tube is inserted over the wire by the endoscopist and advanced while tension is held on the wire by both the surgeon and endoscopist.
■ The tube is then pushed until the surgeon is able to grasp the tapered end as it emerges through the skin.
■ The surgeon then pulls the tube until the button rests loosely against the gastric mucosa, as described earlier.
Securing the Tube
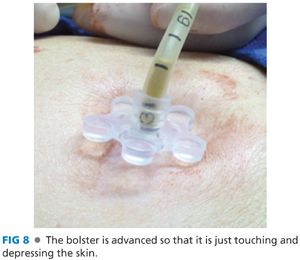
■ The outer bolster included in the kit is then applied to the external portion of the tube and directed toward the skin.
■ The bolster should rest about 2 to 3 mm above the skin.
■ Avoid compressing the abdominal and gastric wall between the bolster and button (FIG 8). This can cause ischemic necrosis to these tissues, potentially leading to abdominal wall infection, tube extrusion, or the stomach falling away from the abdominal wall.
■ The kit manufacturers often recommend and provide antibiotic ointment to be applied to the interface of the tube as it enters the skin to decrease the formation of an abdominal wall infection.
■ The tube is then cut to the appropriate length and an adapter is secured to the end to allow a sealed connection for feeding, drainage, or to secure the cap to prevent leakage.
■ We connect a collection bag during the immediate postoperative period to allow the GI tract to be decompressed of any gas that was insufflated during the procedure and to decrease the risk of reflux during emergence from sedation.
OPEN GASTROSTOMY TUBE
Equipment
■ A standard laparotomy setup should be used.
■ For the G-tube, a 22-Fr Foley catheter or the G-tube from a laparoscopic G-tube kit can be used. There are commercially available G-tubes that allow simultaneous gastric decompression and jejunal feeding, which may be beneficial in some scenarios.
Incision
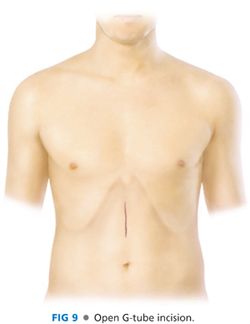
■ When done as a single procedure, a 4-cm upper midline incision to expose the stomach should be used (FIG 9).
■ Just beneath the linea alba, the extraperitoneal fat and the falciform ligament should be retracted to the right to assist with visualization of the left upper quadrant.
■ A small wound protector functions well as a retractor and limits the subcutaneous tissues exposure to contamination from the gastric flora.
Gastrotomy and Tube Placement
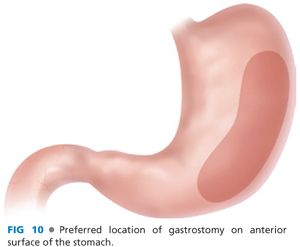
■ The location of the gastrotomy should be on the anterior surface of the midportion of the stomach, close to the greater curve (FIG 10). Mark this point with the cautery or a surgical marking pen.
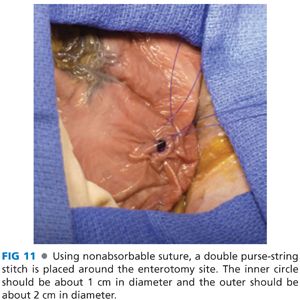
■ Using a 3-0 absorbable monofilament suture on a taper needle, sew a circular purse string around the gastrotomy site with a diameter of about 1 cm. Place a second purse string around the first one concentrically taking care to create a purse string diameter of approximately 2 cm. This allows the gastric wall to partially intussuscept, creating nice track for the tube (FIG 11).
Stay updated, free articles. Join our Telegram channel

Full access? Get Clinical Tree


