Loop Colostomy and Colostomy Closure
A loop colostomy is the easiest colostomy to make and to take down. It is used in situations in which temporary (often emergency) decompression or diversion of colonic contents is required. In this chapter, the construction and closure of a right transverse colostomy is illustrated. Loop ileostomy, an alternative technique of fecal diversion, is described in the references at the end. The equivalent laparoscopic procedure is shown in Chapter 80.
Steps in Procedure—Loop Colostomy
Short transverse right upper quadrant incision
Deliver transverse colon into incision
Remove greater omentum from selected segment of colon
Create a window under the colon, at the antimesenteric border
Tack the loop to the fascia
Pass a colostomy bridge under the loop and secure it
Close skin around loop, if necessary
Open and mature colostomy by suturing mucosa to skin
Place appropriate colostomy bag
Hallmark Anatomic Complications—Loop Colostomy
Failure to divert
Prolapse of defunctionalized limb
List of Structures
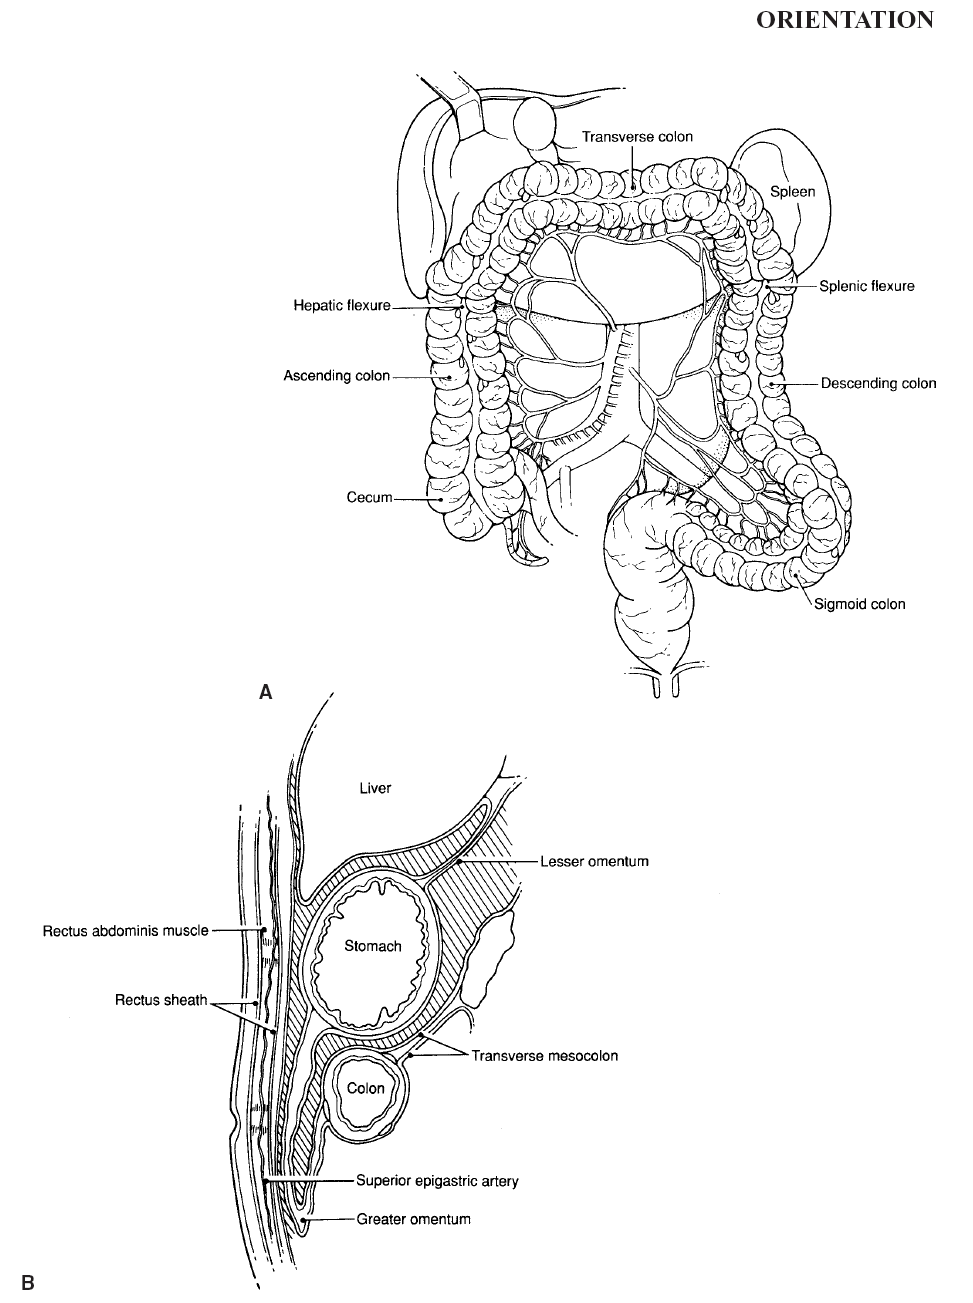
Greater omentum
Transverse colon
Hepatic flexure
Middle colic artery
Marginal artery (of Drummond)
Rectus abdominis muscle
Anterior rectus sheath
Superior epigastric artery
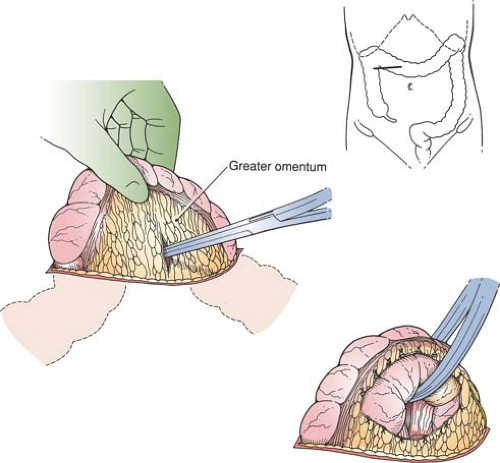
Isolation of Loop (Fig. 79.1)
Technical Points
Make a short (about 10 cm in length) transverse incision in the right upper quadrant. Do not make the incision too far laterally. The transverse colon becomes deeper and higher in the vicinity of the hepatic flexure (lateral) and more mobile in the midsection (medial).
Identify the colon by its overlying greater omentum. Mobilize a greatly distended and dilated colon with caution to avoid spillage of enteric contents. If the incision is not large enough to deliver the loop comfortably, enlarge the incision. Observe the character of the peritoneal fluid. If it is turbid or purulent, a colonic perforation may have occurred. In this case, proceed with a full laparotomy.
Divide the omentum to expose the colon by serially clamping and tying it. Develop a mesenteric window under the colon by passing a clamp or finger through an avascular portion of the mesocolon. Pass a Penrose drain under the colon and use it to elevate the colon.
Anatomic Points
The incision is typically made about halfway between the umbilicus and costal margin, 3 to 5 cm lateral to the linea alba. At this site, all or part of the incision will cross the rectus abdominis muscle. First, cut the anterior rectus sheath, exposing the rectus fibers. Then divide the rectus fibers with electrocautery. Bleeding difficulties may result if the superior epigastric artery is not identified and controlled. This artery (and its venae comitantes) is immediately posterior to the rectus abdominis muscle, about midway between its medial and lateral borders. It usually enters the muscle, anastomosing with the inferior epigastric artery, about halfway between the umbilicus and the xiphoid cartilage.
After the peritoneum is opened, the colon must be identified with certainty. Because the anterior layer of the greater omentum forms the gastrocolic ligament, omentum overlies the colon and thus must be divided to visualize the colon clearly. Use clamps and ties to divide the omentum. Look for the distinguishing haustra, epiploic appendages, and taeniae coli to identify colon positively.
 |
 Figure 79-1 Isolation of Loop
Stay updated, free articles. Join our Telegram channel
Full access? Get Clinical Tree
 Get Clinical Tree app for offline access

|